A 15-Minute DIA Candle Can Hide One High-Dollar-Price Component Doing All The Work, And A Single-Candle Wick Is Not Enough To Prove Otherwise
When you see the eight setups built around how DIA actually confirms a level on the 15-minute chart, you will stop reading a single candle's wick as proof and start checking whether the move behind it is broad across all thirty Dow components or one high-dollar-price stock doing the work alone.
You will know why the Dow's price-weighted structure means a five-hundred-dollar stock moving two percent can swing DIA further than a fifty-dollar stock moving ten percent, why that distortion needs a second candle to separate from a genuine broad move, and which setups from the 5-minute DIA pack in this shop simply do not translate once a single candle covers fifteen minutes instead of five.
Most 15-minute losses in DIA come from applying a cap-weighted read to a price-weighted index, off one candle instead of two.
You will get a first-hour consolidation block, multi-bar confirmed range tests, a multi-bar VWAP swing, a price-weight distortion fade, a cyclical-data reaction range, a Dow reconstitution-day fade, and a thin-liquidity opening-candle fade, all built for a two-candle confirmation standard.
You will see all eight setups in full, entry to exit, before you pay for a single one of them, one dollar unlocked at a time.
DIA is not SPY with thirty stocks instead of five hundred.
It is weighted by a different rule entirely, and a 15-minute candle needs a second one to prove which rule is driving the tape.
Introducing The DIA 15-Minute Range Setups Pack
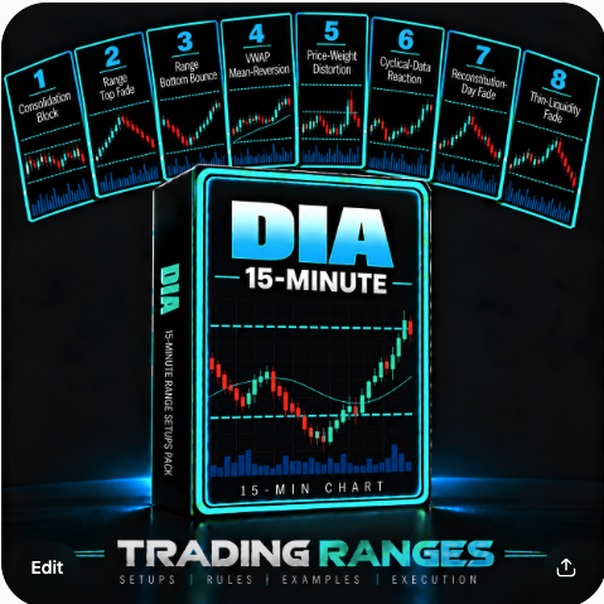
A Trading Ranges Setup Pack
The DIA 15-Minute Range Setups Pack
Eight ways to trade DIA's ranges on the 15-minute chart, built around the Dow's price-weighted structure, its cyclical sector tilt, and a two-candle confirmation standard instead of a faster single-candle read.
- Setups8, each priced individually at $1
- FormatInteractive preview on this page, plus a printable PDF cheat sheet after checkout
- AccessInstant, right after checkout, yours to keep
- Built forDIA specifically, 15-minute chart, using the Dow's own price-weighted mechanic and a two-candle confirmation standard
- AuthorTradingRanges.com
$1 per setup, 8 setups, $8 total. Every setup is priced and shown to you before you pay for any of it.
Try It First
Preview Every Setup In This Pack
Click through all 8 setups below. Each card is the entry trigger, the confirmation, and the invalidation point, the same detail you get after checkout. The bar fills as you go, one dollar unlocked per setup.
What's Inside
All 8 Setups
- 01First-Hour Consolidation Block. Fade both edges of DIA's opening-hour range once two candles confirm it is holding, accounting for the choppier price discovery its thinner opening liquidity tends to produce.15-min chart, first 60 min
- 02Multi-Bar Confirmed Range Top Fade. Short a level only after two 15-minute candles both reject it, so a single high-dollar-price component's own wick does not get mistaken for genuine Dow-wide supply.15-min chart
- 03Multi-Bar Confirmed Range Bottom Bounce. Buy a level only after two 15-minute candles both hold it, the same two-candle standard applied to the downside so you are never guessing which side of the range to trust off one wick.15-min chart
- 04Multi-Bar VWAP Mean-Reversion Chop. Buy dips back toward VWAP once two candles confirm DIA is oscillating around it, the same chop-day read that works on any liquid index product once a genuine trend and no single-component driver are both absent.15-min chart
- 05Multi-Bar Price-Weight Distortion Fade. When a DIA range break traces to one high-dollar-price component moving on its own, fade the break once a second candle confirms that stock's own move has stalled, since the Dow's price-weighted structure means one stock's percentage move can swing the index further than its actual size in the economy would suggest.15-min chart, on an outsized move in a high-dollar-price Dow component
- 06Multi-Bar Cyclical-Data Reaction Range. On a manufacturing, jobs, or industrial-production release, trade a two-candle-confirmed break of DIA's pre-release range in the data's own direction, since the Dow's heavier industrial and financial tilt makes it react to this category of data more directly than QQQ's tech-heavy basket does.15-min chart, on ISM manufacturing, jobs, or industrial-production data
- 07Multi-Bar Dow Reconstitution-Day Fade. On the session a Dow component swap takes effect, fade a level break that comes on unusually heavy volume relative to how far price actually moves, confirmed by a second candle that fails to extend it, since that mismatch often means mechanical index-fund flow rebuilding around the new component list, not a genuine directional decision.15-min chart, the session a Dow component change takes effect
- 08Multi-Bar Thin-Liquidity Opening-Candle Fade. Fade an unusually wide opening candle in DIA once the second candle confirms it was a thin-liquidity artifact, since DIA's lower relative volume compared to SPY means its first 15-minute candle can print a wider range than the order flow behind it actually supports.15-min chart, first candle of the session
RANGES
★
Certificate of Guarantee
60-Day, No-Questions-Asked
If The DIA 15-Minute Range Setups Pack doesn't earn its place in your process, email us any time within 60 days of purchase for a full refund. No form to fill out. No reason required.

Backed personally by Jason Parker, founder of Trading Ranges. He built every setup in this pack himself, covered by the same guarantee above.
Instant Access
$8One-time payment. No subscription.
8 setups × $1 each = $8
Get Instant Access8 SETUPS · INTERACTIVE PREVIEW + PDF CHEAT SHEET · DELIVERED IMMEDIATELY AFTER CHECKOUT · 60-DAY GUARANTEE
A Few Notes On Trading DIA's 15-Minute Ranges
Every setup in this pack requires two 15-minute candles to agree before treating a level as confirmed, not one. A single candle's wick into a level can still be one high-dollar-price component's own move bleeding through into the fund's chart, the same distortion risk that exists on the 5-minute chart, just at a larger scale. Waiting for a second candle is what separates this pack's setups from simply relabeling the 5-minute pack's triggers onto a bigger candle.
DIA tracks the Dow Jones Industrial Average, and the Dow is price-weighted, meaning a component's influence on the index is proportional to its share price alone, not its market capitalization. A stock trading at several hundred dollars a share moving two percent can move DIA further in point terms than a much larger company trading at a lower share price moving ten percent. The Dow's thirty components also lean more heavily toward industrials, financials, and healthcare than QQQ's tech-heavy basket or even SPY's broader mix, so DIA reacts more directly to manufacturing data, jobs reports, and rate-sensitive financial-sector news, and with meaningfully lower daily volume than SPY, its liquidity profile shows up most clearly in the first 15-minute candle of the session, before genuine price discovery settles in.
None of this is built for the session a scheduled Fed decision or a major cyclical-data surprise actually lands. On those sessions the range tends to break on the release and keep going. The cyclical-data setup below is built for a confirmed reaction, not the release candle itself, and the reconstitution setup is built for the mechanical rebalancing flow around a component change, not a genuine directional catalyst landing the same day.
Common Questions
Why is this priced at $1 per setup?
Every setup in The DIA 15-Minute Range Setups Pack is priced individually and added up. This pack has 8 setups, so it is $8 total, no more and no less. The interactive preview above shows every setup before you pay, so nothing is padded in to round out a bundle.
How is this different from the 5-minute DIA pack in this shop?
This pack's setups are built for what actually changes on a chart where one candle covers fifteen minutes instead of five. Several setups here need two consecutive candles to confirm, not a single candle's wick, and the price-weight distortion and reconstitution-day setups use a two-candle read that would not make sense on a faster chart. If you already own the 5-minute DIA pack, this is a genuinely different confirmation standard, not a duplicate.
What timeframe is this pack for?
Every setup in this pack is built for the 15-minute chart specifically.
What do I actually get after I pay?
Instant access to a printable PDF cheat sheet with the entry trigger, confirmation, and invalidation point for all 8 setups in this pack, the same detail shown in the preview deck above, formatted for a second screen or the desk next to your monitor.
Is there a guarantee?
Yes. The same 60-day, no-questions-asked guarantee as everything else in the shop. Email any time within 60 days of purchase for a full refund.